
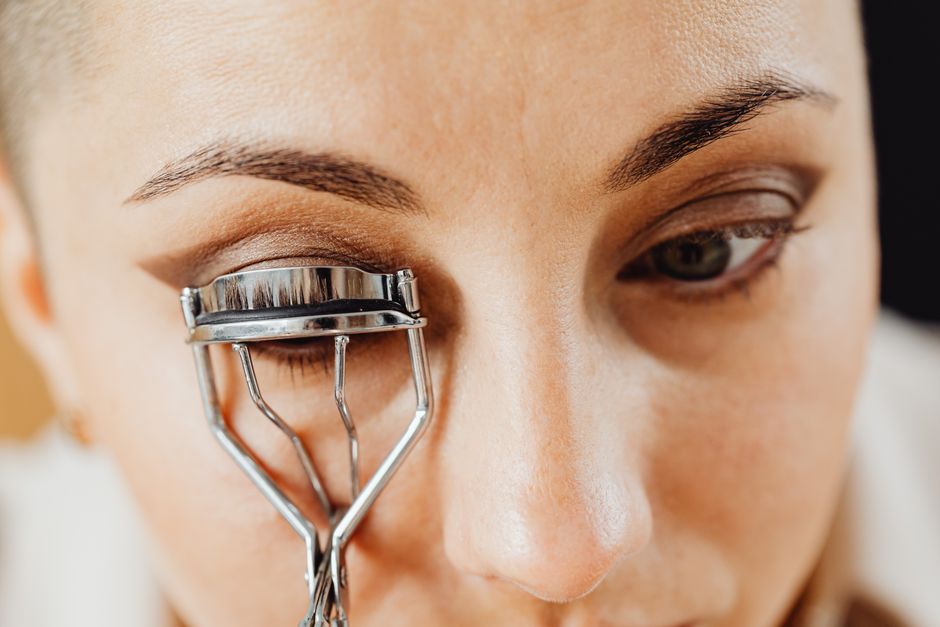
A little lift can make fine eyelashes easier to see without asking them to carry layers of makeup. The trick is to treat curling as a careful shaping step, with comfort guiding every movement. You are aiming for a soft upward curve, not the strongest bend your tool can produce. Whether your lashes have always been delicate or simply feel less substantial than they once did, a gentler routine starts with choosing a curler that fits and knowing when to leave well enough alone.
Start with the lashes you have today
Fine lashes are not necessarily sparse lashes. You may have plenty of hairs that are individually slender, or a smaller number with uneven lengths. Look closely in good light before reaching for a tool. Notice where the shortest hairs sit, whether the outer lashes point sideways, and whether either eye feels irritated. This quick check helps you work with your actual lash line instead of copying a shape that suits someone else.
If your eyelids are sore, swollen, or uncomfortable, skip curling and eye makeup. The same applies when lashes seem to be breaking or falling out unusually. Persistent lash loss or skin irritation deserves a conversation with a dermatologist; discomfort involving the eye itself needs advice from an eye-care professional. More pressure is never a useful response to a lash line that is already unhappy.
Let the curler fit your eye
A curler can look perfectly ordinary and still be the wrong shape for you. Its curve should let the upper lashes rest across the cushion without forcing the frame into your eyelid. If it catches the center but misses both corners, or pinches skin whenever you try to reach the roots, repositioning may not solve the problem. A different shape may be more comfortable.
Inspect the cushion and frame
Before each use, check that the cushion is seated securely and that the upper edge meets it evenly. A split, hardened, loose, or deeply grooved pad is a reason to stop using the tool until the correct replacement is fitted. Follow the manufacturer’s replacement guidance. Do not improvise with a pad that does not belong to the curler, and retire a frame that is bent or misaligned.
Open and close the empty curler slowly to check that its movement is smooth. Sticky handles or a sudden snap make controlled pressure harder. Keep the contact surfaces clean according to the tool’s instructions, and let them dry fully before use. Old mascara on the cushion can make lashes stick, turning an otherwise careful release into an unnecessary tug.
Set up before you squeeze
Curl bare, dry upper lashes before applying mascara. Coated lashes can stick to the tool, and dried mascara makes them less flexible. If you have already finished your mascara, accept the shape for that day rather than trying to correct it with a clamp. Do not curl lashes that are still damp from washing or makeup removal.
Use a clear mirror and steady lighting so you can see where the cushion sits. If it helps, rest your elbow on a stable surface. You should not need to lean so close that your posture becomes strained. Keep the tool at room temperature: heating a metal curler with a hair dryer or hot water adds a burn risk near delicate skin and eyes.
Make a soft curve with controlled pressure
Take your time placing the curler. Open it fully, look slightly downward, and guide your upper lashes onto the cushion. Position it near the roots while keeping the frame comfortably clear of the eyelid. There is no need to reach the closest possible point. A little distance is preferable to trapping skin.
- Check that the lashes you intend to curl lie freely across the pad and that no skin is between the edges.
- Close the handles slowly until the cushion holds the lashes with light pressure. Stop immediately if you feel pinching or pulling.
- Hold briefly, following the tool’s directions, without tightening your grip to chase a stronger result.
- Open the curler completely before moving it away. Never slide a closed curler along your lashes.
- Look at the result before deciding whether another gentle placement is worthwhile.
If your lashes are long enough and the tool fits comfortably, a light second placement farther along their length can soften the transition from root to tip. Fully release the tool before repositioning it. Short lashes may not offer enough room for this, and that is fine. One comfortable lift is better than repeated attempts to force a rounded shape.
Give each eye its own approach
Your eyes and lash directions may differ slightly. One side might lift easily while the other keeps a flatter outer corner. Adjust the placement only while the curler is open; do not twist or tilt it while the lashes are clamped. Aim for a similar overall effect rather than identical individual hairs. A small difference is rarely noticeable once the rest of your makeup is on.
Add definition without chasing more lift
After curling, pause and see whether the shape alone gives you enough definition. Fine lashes do not need mascara on every occasion. If you want it, use a modest amount and avoid repeatedly brushing through as the coating dries. Heavy buildup can make a delicate curl look less airy, even when the initial shape was lovely.
Let the mascara set without touching or squeezing the lashes. If the curl relaxes later, leave the curler aside. A softer finish can still look polished, and it does not mean you did the morning routine incorrectly. Lash direction, tool fit, and the makeup you use all affect the final appearance. Stronger clamping is not a dependable fix.
Know when to simplify
A sharp kink suggests that your pressure or placement needs adjusting next time. Pinching means you should stop and reassess the fit. Lashes sticking to the pad call for cleaning and a check that you are working on bare hairs. If the routine repeatedly feels awkward, skip curling while you consider a better-fitting tool. You do not have to make an uncomfortable curler work.
Avoid adding oils, homemade mixtures, or products that are not intended for the eye area in an effort to prepare lashes for curling. Patch test new cosmetics as directed, away from the eye itself, and stop using anything that causes irritation. At the end of the day, remove eye makeup gently according to its directions, allowing the remover time to loosen it before wiping.
The most useful stopping point is a comfortable lash line and a curve you like. Some mornings that will mean one light pass; other mornings it will mean leaving your lashes alone. Fine lashes can frame your eyes beautifully without a dramatic bend, and a routine that feels easy is far more wearable than a result you have to keep correcting.