
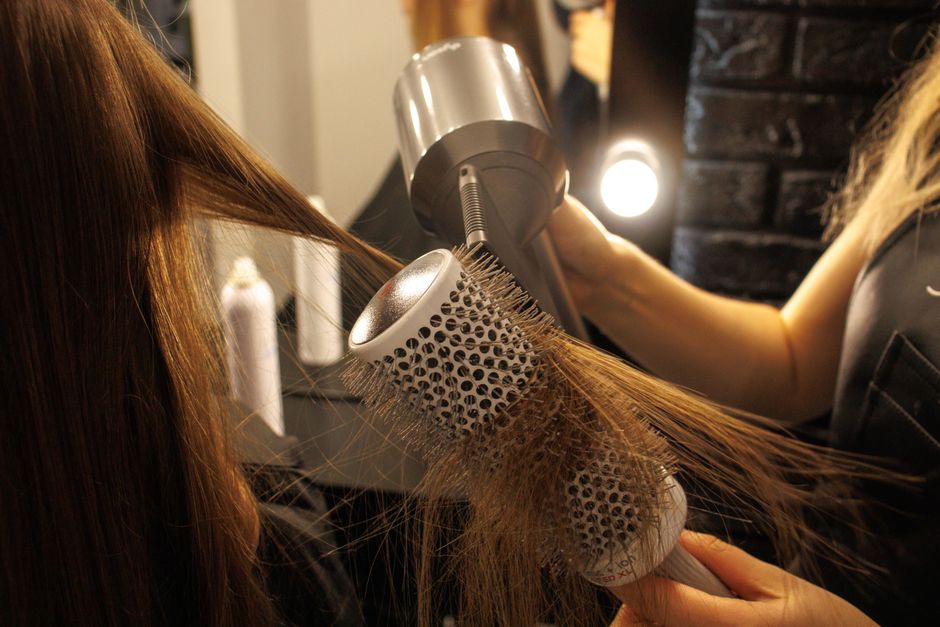
A bob can look beautifully finished with just a gentle curve at the ends. Turning that last part inward helps the outline sit neatly around your face and neck while keeping the rest of your hair relaxed. The useful skill is controlling where the bend begins. With a round brush, manageable sections, and comfortable heat, you can guide the ends under without winding your whole haircut into a curl.
This approach suits days when you want a smooth, softly rounded outline. You can keep the crown fairly flat, leave your part where it naturally falls, and concentrate your effort along the bottom edge. Aim for an easy curve rather than identical little rolls all around your head.
Choose a brush that leaves room to work
Your brush needs to fit beneath the shortest section you plan to style. If its barrel is too large, the ends may barely reach around it. If it is very small, you may create a tighter curl than you intended. Look for a size that lets the ends follow a gentle arc without wrapping the whole section around the barrel.
Check the grip and weight, too. You should be able to hold the handle comfortably while moving your wrist a little. Bristles should catch the hair without scratching your scalp or demanding a hard pull. A brush that keeps snagging is making the task harder, regardless of its shape.
- For a subtle tuck: Choose a barrel that supports a broad curve within your hair’s length.
- For short nape sections: A smaller brush may be easier to position, but use only a slight turn.
- For fragile or easily tangled hair: Prioritize gentle handling and easy release over a very firm grip.
Prepare the hair before shaping the ends
Gently blot freshly washed hair and detangle it before bringing in the round brush. Follow the directions on a heat protectant, including whether it belongs on damp or dry hair. Patch test unfamiliar styling products according to their instructions, especially if your scalp is sensitive. More product is not necessarily helpful; coated ends can become difficult to move through the brush.
Dry away most of the moisture with your usual gentle method, leaving the sections you want to shape slightly damp. Avoid starting with dripping hair, which makes brush work unnecessarily long. If your natural texture needs more preparation to achieve a smooth finish, work in smaller sections rather than compensating with hotter air or stronger pulling.
Use a comfortable heat setting and keep the dryer moving. Keep its nozzle away from your hair, scalp, and brush barrel rather than pressing it against them. A heat protectant does not make excessive heat harmless. If your hair or scalp feels uncomfortably hot, stop and let it cool.
Divide your bob into sections you can control
Set your part first, then clip the upper layers out of the way. Start with the lower sections at the back or sides, wherever you can work comfortably. Each section should fit across the useful width of the brush without spilling over its ends. It should also be thin enough for air to reach through it.
You do not need a complicated sectioning pattern. A lower layer followed by the hair above it is often manageable. For dense hair, divide those layers further. With fine or sparse hair, avoid pulling tightly to make a section feel fuller on the brush. Gentle, steady contact is enough.
Make the curve with a small wrist movement
Place the brush underneath
Slide the round brush beneath a section with the bristles facing into the hair. Begin far enough above the ends to guide them smoothly, but keep the barrel away from the scalp. Draw the brush slowly down the section while directing the airflow from above, along the hair toward the tips.
Keep your elbow and shoulder in a comfortable position. You should not need to lift the section high or stretch your arm behind your head. If the angle feels awkward, reposition yourself or choose a smaller section before continuing.
Turn only as the tips reach the barrel
When the brush reaches the final part of the section, rotate your wrist slightly so the tips curve inward toward your neck. Continue guiding the airflow along the hair as it follows the brush. The movement is a small turn under, not repeated rolling. Keep the section lightly supported instead of winding it tightly around the barrel.
For a quiet, natural finish, let most of the length remain straight and bend only the ends. If you start turning higher up, you will create a rounder overall shape. Neither finish needs to be dramatic; stop when the outline looks comfortable around your face.
Cool, then release gently
Once the section feels dry, switch to cool air while supporting its curve. Then ease the brush downward and out, following the bend rather than tugging straight through it. Let the section rest while you move on. Repeatedly brushing through it immediately can disturb the shape you just made.
Handle the sides and nape without overworking them
Around your face, use your free hand to keep stray strands from joining the section. Guide the brush downward before turning the ends toward your jaw or neck. Keep the dryer clear of your ears and face. Compare both sides with your head upright; tilting toward the mirror can make one side appear longer or more curved.
At the nape, work only where you can comfortably control both tools. Short hairs may need a smaller brush and a very modest bend. If you cannot reach safely, leave that section softly straight. The outer layers can still give your bob a curved outline without every hidden strand turning under.
Adjust the technique when the ends resist
If one side flicks outward, check whether the section was too thick or still damp when you released it. Lightly dampen just that area if needed, reapply heat protection as directed, and reshape it once. Hair growth patterns, layers, and contact with your shoulders can also affect how the edge sits.
If the ends look too curled, reduce the wrist turn on the next section. A larger suitable barrel or starting the bend closer to the tips may help. Avoid trying to undo a tight curl with repeated hot passes; let the hair cool before deciding whether it needs another attempt.
If the brush catches, stop the dryer and gently unwind the section. Do not pull harder. Next time, take less hair and keep it from wrapping around the barrel. For persistent scalp irritation, unusual shedding, or recurring breakage, see a dermatologist rather than increasing styling tension.
Let the finished outline stay soft
When your hair is cool, check the perimeter with your head in its normal position. Separate any overly uniform sections lightly with your fingers. You can tuck one side behind an ear or leave both sides loose without perfecting every tip. A successful finish is a comfortable inward curve that still lets your bob move.